Quit Paying for 3D AI: Mastering the 100% Local Hunyuan3D-2 Workflow
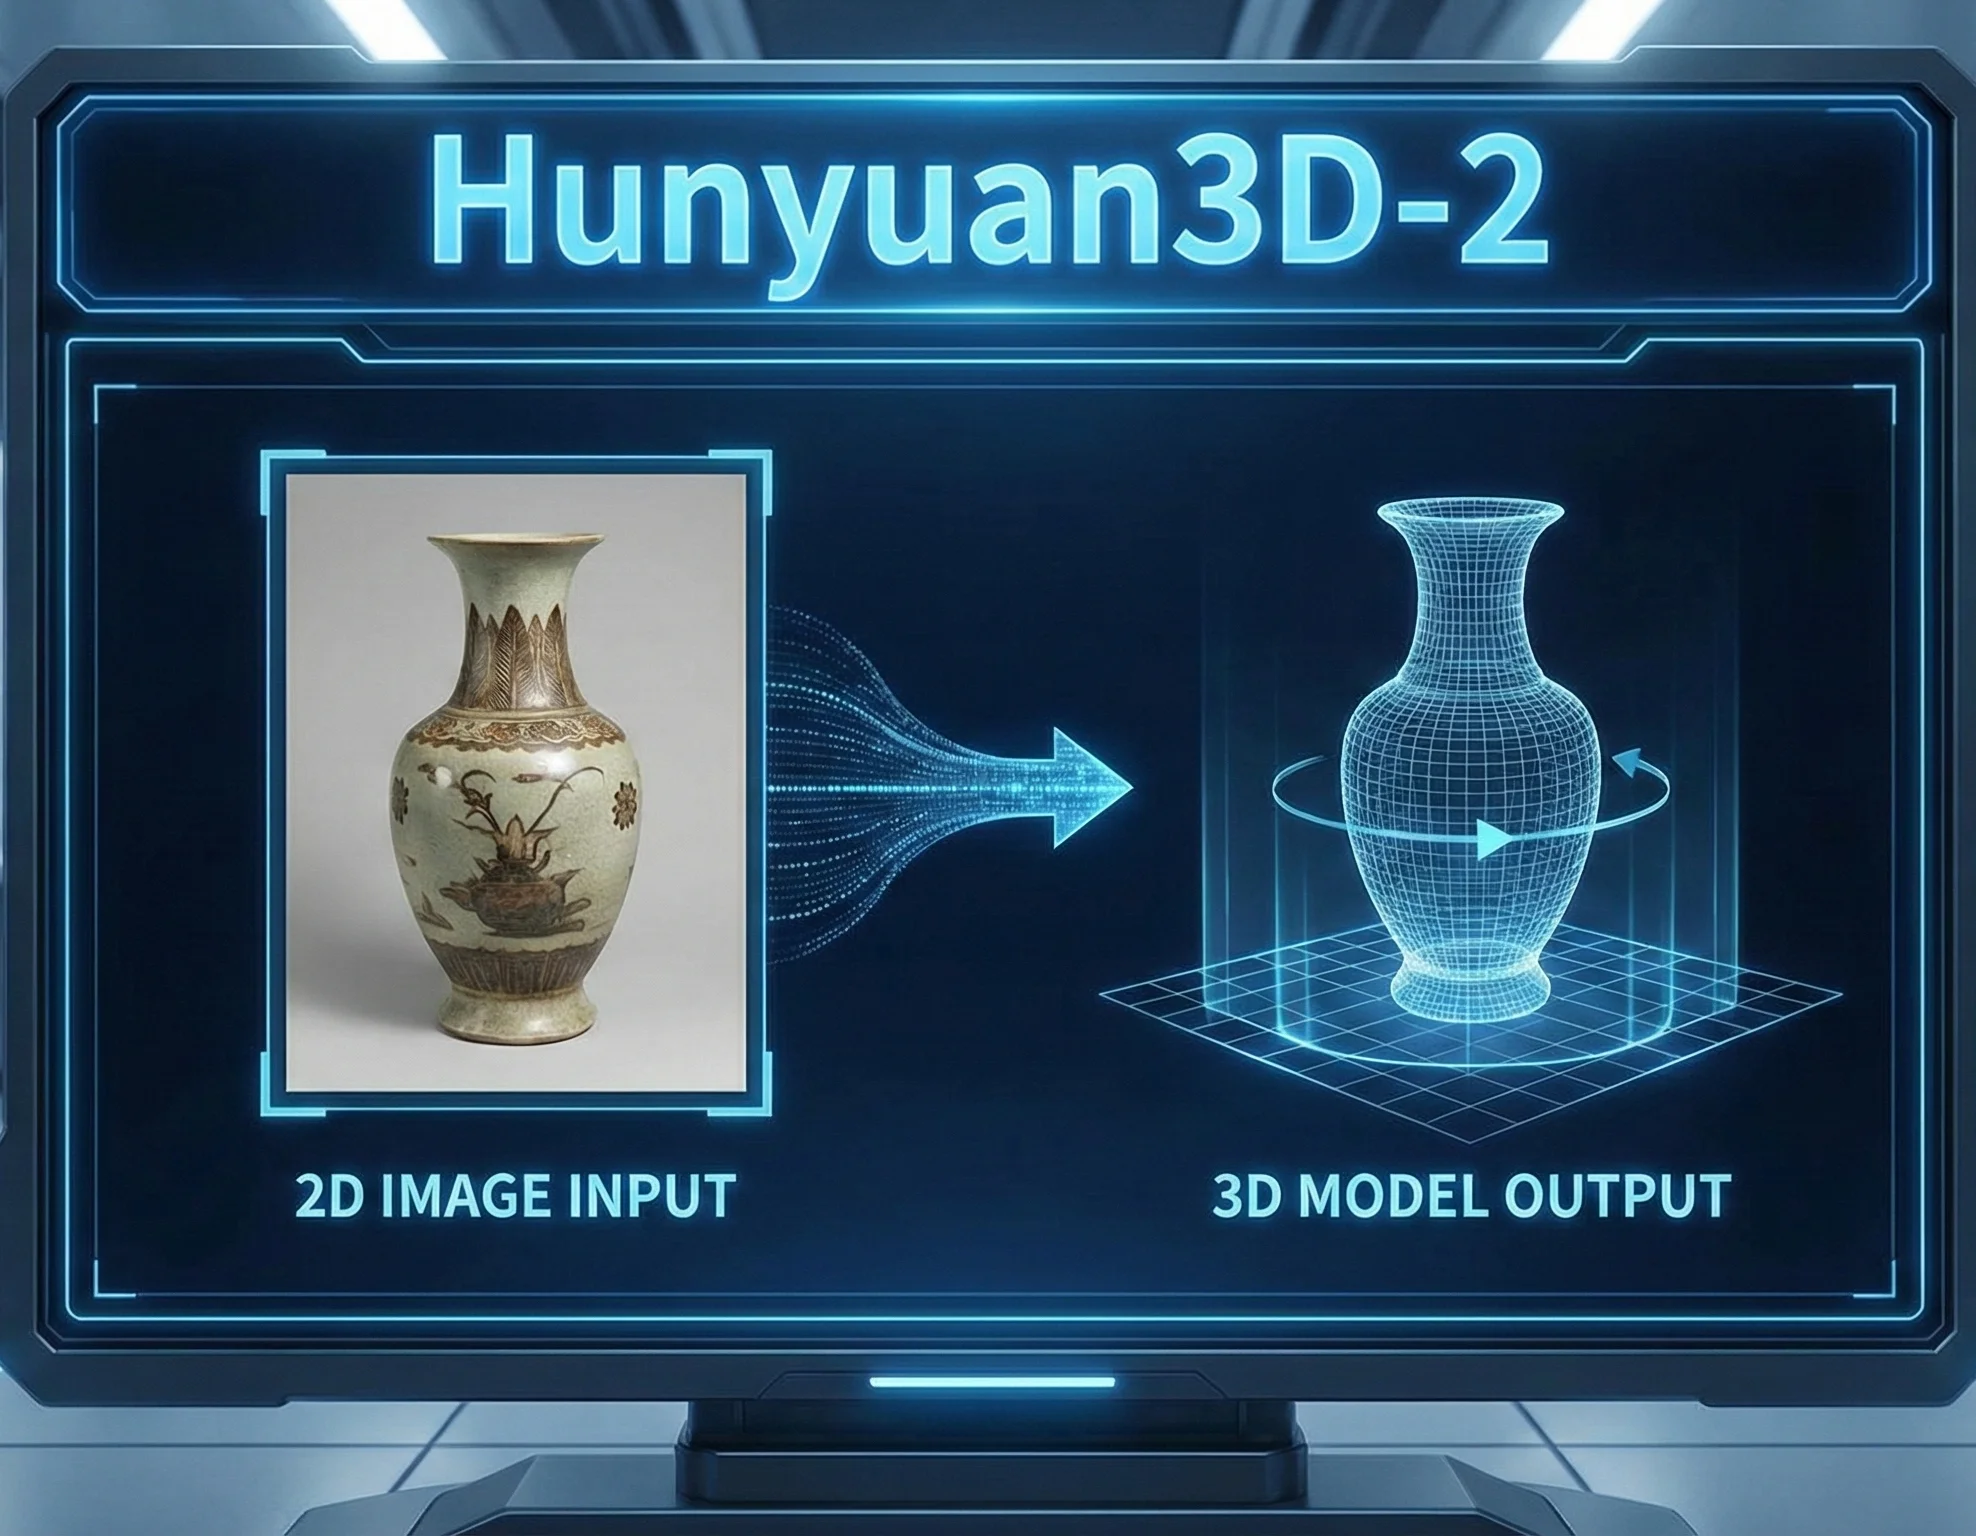
Hunyuan3D-2 by Tencent is undeniably one of the most powerful 3D synthesis systems available today. Its capacity to turn a single 2D image into a complex 3D mesh in minutes is groundbreaking. However, for those of us who prefer absolute control over our digital environment, or for those dealing with restrictive corporate firewalls or flaky internet connections, relying on the cloud for every startup is a dealbreaker.
Today, we're going to dive into exactly what we did to wrestle Hunyuan3D-2 into a fully offline, locally hosted tool. No more hanging downloads, no more Hugging Face connection timeouts on startup. Below is the simplified, 4-step guide to our exact setup.
The "Modeling Wall"
For custom 3D printing jobs, modeling from a photo usually takes 8 to 12 hours. Hunyuan3D-2 automates this, but you need it to work every time you click launch, even without internet. By going offline, you ensure your workflow is fast, private, and reliable.
Step 1: Check Your Hardware
To run this powerhouse on your own machine, you need:
- GPU: NVIDIA RTX series (RTX 2060 or better).
- VRAM: 8GB minimum (16GB+ recommended for high-quality textures).
- Disk Space: 50GB+ free SSD space.
Step 2: Install the CUDA Foundation
You must install PyTorch with CUDA support so the AI runs on your GPU, not your slow CPU. Run this command first:
pip install torch torchvision torchaudio --index-url https://download.pytorch.org/whl/cu124This installs the exact version (2.6.0+cu124) we used for our seamless setup.
Step 3: Download Models (The "One-Time" Step)
Instead of letting the software download files randomly, download them once using this script. This ensures you have everything you need before going offline.
Pro Tip: In our setup, we skipped the Text-to-3D models entirely. Since we only focus on Image-to-3D, skipping these unnecessary weights saves massive disk space and further speeds up the initial setup!
from huggingface_hub import snapshot_download
local_dir = r"C:\Path\To\Your\Hunyuan3D-2\models"
# Download essential weights
snapshot_download(
    repo_id="tencent/Hunyuan3D-2",
    allow_patterns=["hunyuan3d-paint-v2-0-turbo/*", "hunyuan3d-delight-v2-0/*"],
    local_dir=local_dir,
    local_dir_use_symlinks=False
)
Tip: Also ensure you have the background removal models (u2net) in your models folder.
Step 4: Create the "Offline Launcher"
Create a script (e.g., launch_offline.ps1) to tell the software to ignore the internet and use your local files. This prevents connection timeouts on startup.
# Force Offline Mode
$env:HF_HUB_OFFLINE = "1"
$env:TRANSFORMERS_OFFLINE = "1"
$env:HY3DGEN_MODELS = "C:\Path\To\Your\models"
$env:U2NET_HOME = "C:\Path\To\Your\models\u2net"
# Launch the App
python gradio_app.py --device cuda --low_vram_mode
Step 5: One-Click GUI Launcher (Windows)
If you prefer a visual interface over the command line, we have implemented a dedicated desktop launcher. This allows you to start and monitor the server with a single click. I personally designed and coded this UI to streamline the entire startup process.
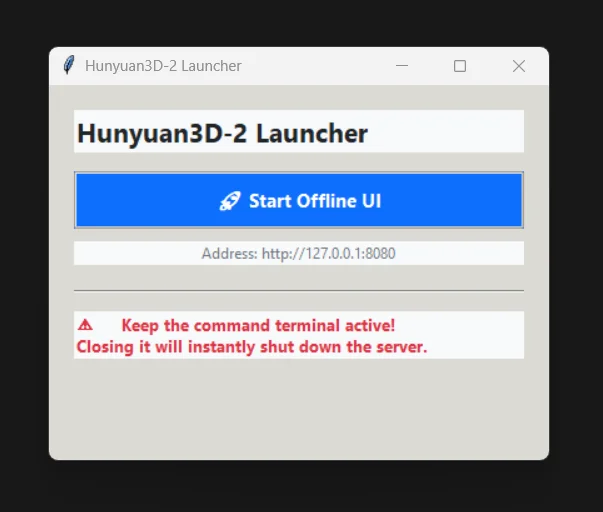
- Locate the File: Find
Start_UI.batin your main project folder. - The Interface: Double-clicking this file opens a specialized Hunyuan3D-2 Launcher window.
- One-Click Start: Simply click "🚀 Start Offline UI". The launcher will automatically handle the PowerShell execution and open the browser for you once the system is ready.
- Status Monitoring: The launcher monitors the server in real-time. If the system is already running, it will tell you; if the server shuts down, the button resets automatically.
- New - Force Stop: I've added a "🛑 Stop / Kill Server" button that appears once the system is online. This allows you to instantly terminate a hanging process safely.
Download Launcher Tool
Get the latest version of the custom GUI launcher ready to go. Simply download both files and place them in your Hunyuan3D-2 main folder.
The Launcher Source Code
For those interested in how I built this, here is the complete source code for our custom launcher UI. It uses Python's Tkinter for the interface and threading to monitor the server status without freezing the window.
1. Start_UI.bat (The Entry Point)
@echo off
echo Starting Hunyuan3D-2 Launcher...
if exist ".\venv\Scripts\pythonw.exe" (
    start "" ".\venv\Scripts\pythonw.exe" launcher.py
) else if exist ".\venv\Scripts\python.exe" (
    start "" ".\venv\Scripts\python.exe" launcher.py
) else (
    start "" pythonw launcher.py
)
2. launcher.py (The Logic)
import os, subprocess, tkinter as tk
from tkinter import ttk, messagebox
# ... [Logic includes real-time port polling, threading, and browser delivery] ...
class LauncherUI:
    def __init__(self, root):
        self.root = root
        self.root.title("Hunyuan3D-2 Launcher")
        self.root.geometry("400x300")
        self.create_widgets()

    def kill_hanging_server(self):
        """Instantly kills the process holding port 8080."""
        pid = self.get_port_pid()
        if pid:
            subprocess.run(['taskkill', '/F', '/PID', pid])
        self.reset_button()
The full 160+ lines of code handle everything from real-time port polling to automatic browser delivery. It bridges the gap between a CLI script and a professional tool.
Mastering the Interface: Setting Explanations
To get the most out of Hunyuan3D-2, you need to understand the levers and dials. Here is a breakdown of the core settings:
The "Options" Tab
This is where you set the primary behavior of the AI engine.
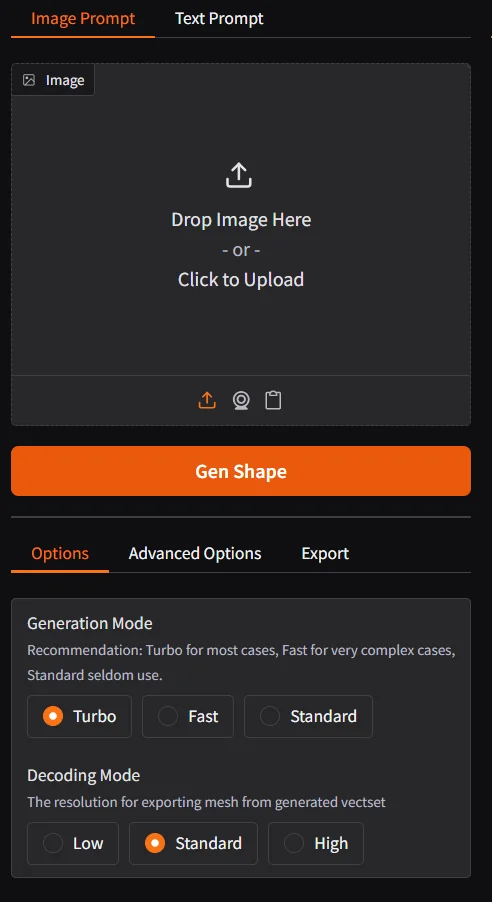
- Generation Mode:
- Turbo (Recommended): Uses advanced distillation to provide results in seconds. It’s the standard for almost every case.
- Fast: A specialized mode for slightly more complex objects that might need more "thought" than Turbo.
- Standard: The original, slower method. It's rarely used now but kept for legacy comparisons.
- Decoding Mode: This controls the resolution of the exported mesh. High gives you the most detail but can result in very heavy files. Standard is usually perfect for most 3D prints.
The "Advanced Options" Tab
Use these for fine-tuning your results.
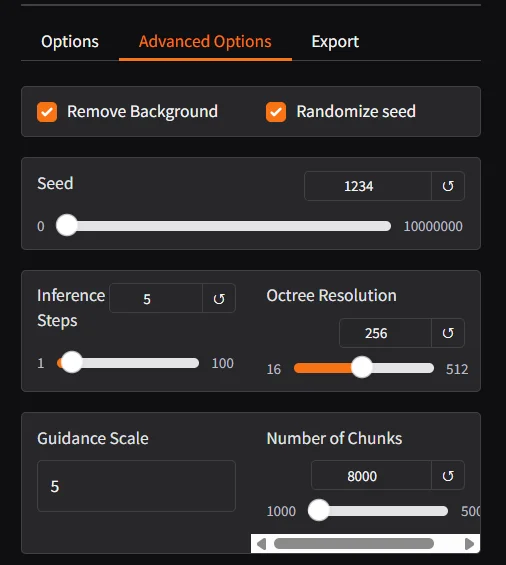
- Remove Background: Always keep this checked. It ensures the AI only models the object, ignoring any noise in the image.
- Seed & Randomize Seed: The "Seed" is a number that determines the random noise used for generation. If you find a setting you love, uncheck "Randomize" and save the seed number to repeat the exact same result later.
- Inference Steps: The number of iterations the AI takes to polish the shape. Higher steps = more detail, but longer wait times.
- Octree Resolution: Controls how "tight" the internal grid is. Higher resolution captures sharper edges and finer parts.
- Guidance Scale: Think of this as the "Creativity vs. Accuracy" slider. Higher scale forces the AI to stick strictly to your photo, while lower values give it room to interpret.
- Number of Chunks: Affects how the data is processed internally; useful for managing memory on complicated meshes.
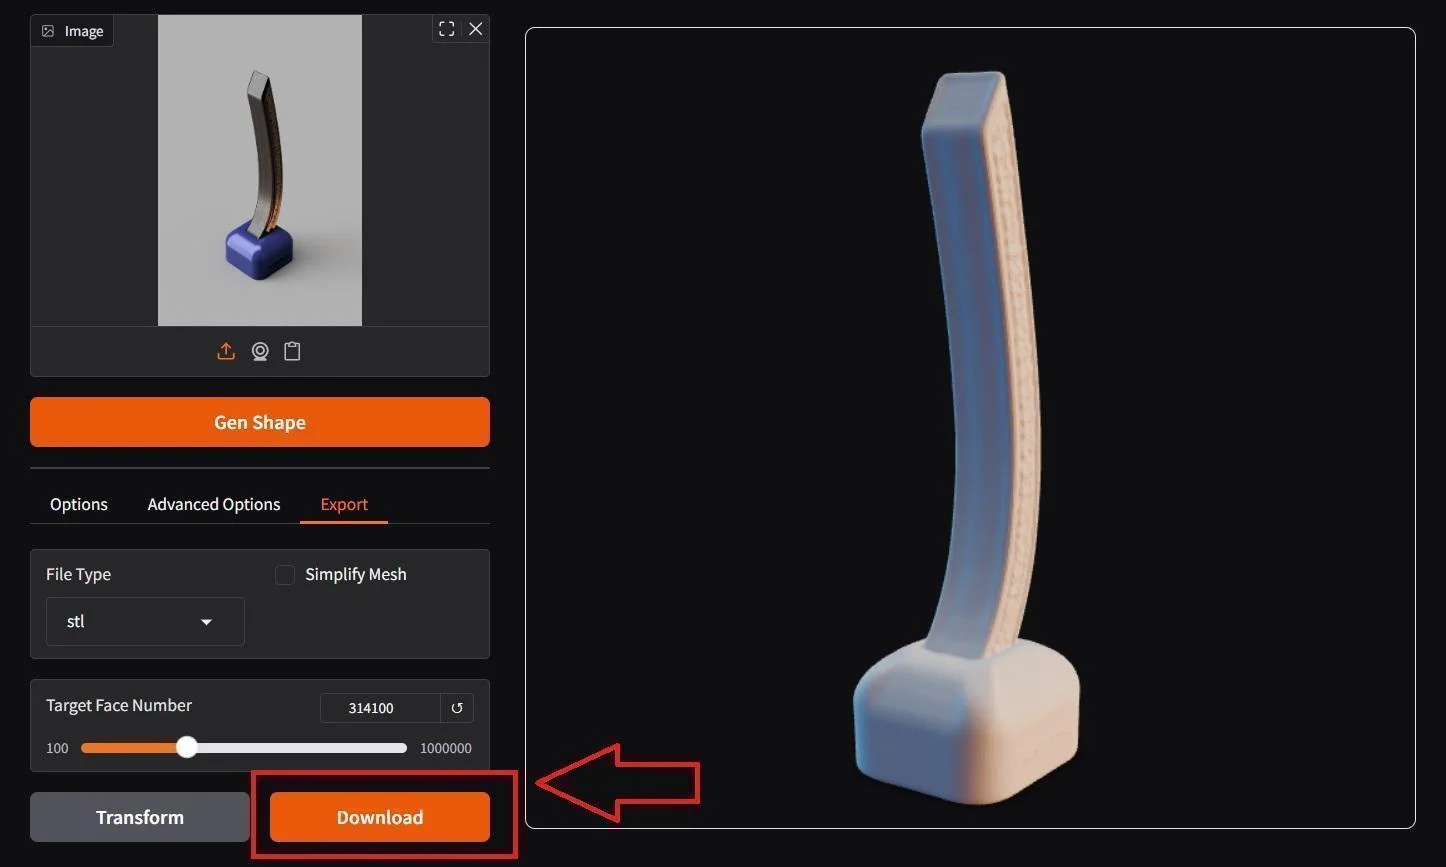
The "Export" Tab
The final step before your printer takes over.
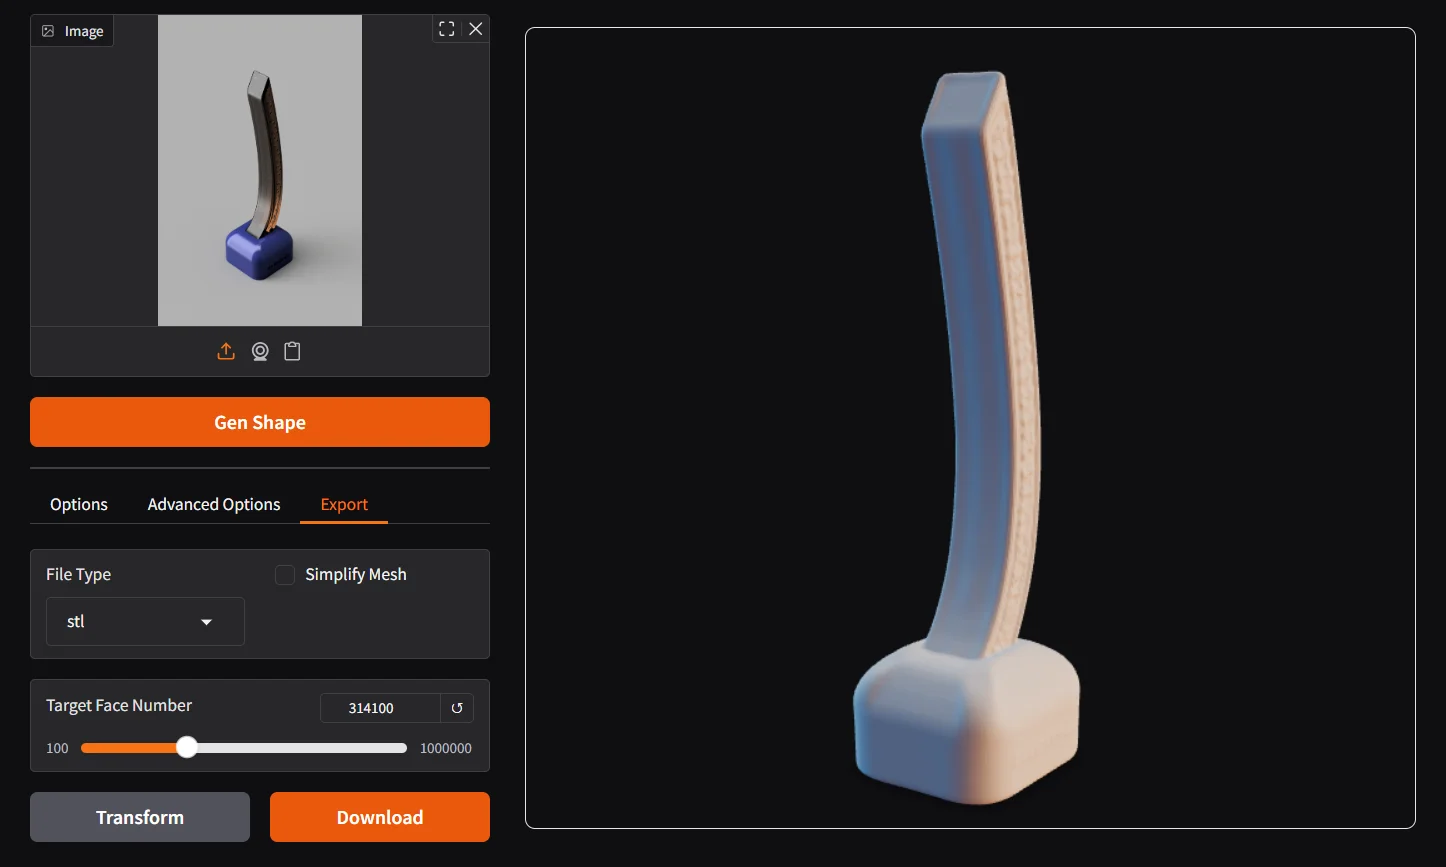
- File Type: For 3D printing, always select STL. If you are doing game development or web AR, use GLB.
- Simplify Mesh: If your model has millions of triangles, your slicer might crash. Use this to reduce the complexity without losing visual quality.
- Target Face Number: Tells the AI exactly how many triangles you want in the final file. 500k to 1 million is usually the sweet spot for high-detail 3D printing.
The Result: A Flawless Workflow
Now, your workflow is simple:
- Initialize the Launcher: Open
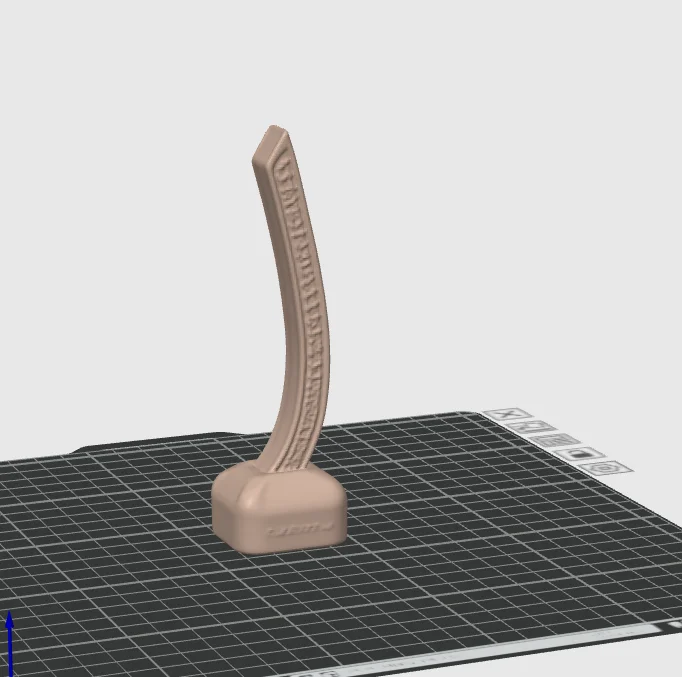
Start_UI.batto launch the custom GUI and start the local server. - Export Your Model: Once satisfied with the preview, download the generated STL file from the Export tab.
- Slice & Print: Load the STL into your preferred slicer software and proceed to print.
- Review & Iterate: If the model meets your expectations, shut down the launcher server; otherwise, adjust the settings and regenerate until you get the required result.
Resources
- GitHub Project: Tencent-Hunyuan/Hunyuan3D-2
- Hugging Face Models: tencent/Hunyuan3D-2.1
Frequently Asked Questions
Can I run Hunyuan3D-2 on a 12GB VRAM GPU?
Yes. While the standard pipeline originally required more, the community-optimized "low_vram_mode" (included in our launcher) allows shape generation to run comfortably on 12GB cards, and even as low as 8GB with some speed trade-offs.
Does Hunyuan3D-2 require an active internet connection?
No. After the initial weights (~30GB) are downloaded, the entire synthesis process is 100% local. Our custom launcher forces offline mode, ensuring your source images and generated 3D models never leave your machine.
Is the generated mesh ready for 3D printing?
Hunyuan3D-2 generates high-quality OBJ/GLB/STL meshes. While the geometry is usually excellent, we recommend a quick check in Blender or Meshmixer to ensure the mesh is manifold and correctly scaled for your specific printer.
How long does it take to generate a 3D model with Hunyuan3D-2 locally?
On an RTX 4070 (12GB VRAM), generating a complete, textured mesh takes approximately 20 to 45 seconds depending on model complexity and resolution settings.
What file formats does Hunyuan3D-2 export?
It primarily exports standard 3D formats like OBJ, GLTF, or USDZ, which can be easily imported into Blender or CAD software for mesh cleanup and slicing.